Wednesday, January 23, 2013

Mocha Almond Dacquoise

I am on the email distribution list for Cooks Illustrated/America's Test Kitchen, and near the end of the year, their newsletter included this recipe for a special NYE dessert.  I highly recommend watching the video they've posted, because that is what makes it look so easy. Even though I had other preparation to do for dinner, I was inspired try it. It is a great recipe for make ahead, and not only does it require a minimum of a few hours to rest in the fridge, and gets better after 24 hours, it also retains flavor and texture for over three days.

I started making each component on Sunday morning and was planning to assemble it Sunday evening so it could rest overnight. Sunday afternoon, as my dacquoise was cooling and my buttercream was chilling, one of my guests emailed and asked to bring dessert. Buttercream and ganache keep just fine, and meringue should be okay sealed in an airtight container as long as it isn't exposed to moisture. So I didn't end up assembling the full cake until Wednesday evening, and we were still eating it like it was fresh-made on Saturday night.

Though Cooks Illustrated names this cake "Dacquoise," the word actually refers only to the layers. Dacquoise is meringue made with the addition of ground nuts. Both The Joy of Cooking and The Cake Bible has a different ratio of ingredients, and I will try another recipe next time; though I really enjoy very sweet desserts, I find that most people do not, and I think this is bordering on "too sweet."

As you can see from my photos, I didn't bother to spend a lot of time decorating it because it was just for Will and me, and not for company... though I rarely make a dessert as a "test run," in this case it was kind of fun to have it just eat and I will definitely make it again for a special occasion. 


The recipes below are for my future reference. The link above has very easy-to-follow step-by-step instructions if you are making it for the first time, but the versions below scale back the sweetness. Also, in my version, I used all almonds instead of part hazelnuts.

Dacquoise
from The Joy of Cooking
3/4 cup toasted almonds, finely ground
1 tablespoons cornstarch
1/3 + 1/2 cup superfine sugar
4 large egg whites (1/2 cup)
1/2 teaspoon cream of tartar

Preheat oven to 200. Outline 13" x 10 1/2" rectangle on sheet of parchment, and lay outline-side down on cookie sheet.
Pulse nuts, cornstarch, and 1/3 cup sugar in food processor until finely ground.
Beat whites until frothy, add cream of tartar, and beat at medium until soft peaks form. Slowly add remaining 1/2 sugar, beating until stiff peaks form.
Carefully fold in nut mixture and spread immediately on parchment in desired shape.
Bake for 1 1/2 - 2 hours, then turn off oven and leave with oven door closed for another 1 1/2 -2 hours.


While meringue is baking, make buttercream,

Coffee Buttercream3/4 cup whole milk
4 large egg yolks
1/4 cup sugar
1 1/2 teaspoons cornstarch
1/4 teaspoon salt
2 tablespoons amaretto (I used Frangelico because that is what I had; it is hazelnut liquer)
1 1/2 tablespoons instant espresso powder
16 (2 sticks) tablespoons unsalted butter, softened

Heat milk in small saucepan over medium heat until just simmering. In separate bowl, whisk yolks, sugar, cornstarch, and salt in bowl until smooth. Remove milk from heat and, whisking constantly, slowly whisk a couple tablespoons of milk into yolk mixture. Whisking constantly, return tempered yolk mixture to remaining milk in saucepan.
Return saucepan to medium heat and cook, whisking constantly, until mixture is bubbling and thickens to consistency of warm pudding, 3 to 5 minutes. Cover and refrigerate until set, at least 2 hours or up to 24 hours.

Stir together liqueur and espresso powder. Using stand mixer fitted with paddle, beat butter at medium speed until smooth and light, 3 to 4 minutes. Add pastry cream in 3 batches, beating for 30 seconds after each addition. Add amaretto mixture and continue to beat until light and fluffy, about 5 minutes longer, scraping down bowl thoroughly halfway through mixing.


When dacquoise is completely cool, peel off parchment, and trim edges flat using a bread/serrated knife. Measure and score 3" wide rectangles (by 10" long) and gently score through sheet of meringue with long sweeping cuts. These sheets are delicate so proceed carefully and with very light pressure.

Ganache
6ounces bittersweet chocolate (Lindt 70% or 85%), chopped fine
3/4cup heavy cream
2 teaspoons corn syrup
Heat cream to simmer. Pour over chopped chocolate and let rest one minute. Stir until smooth and stir in corn syrup. Set aside to cool, stirring periodically, until spreadable consistency.

Spread a thin layer of ganache on the flat side of each of 3 dacquoise layers. Place in single layer in fridge 15 minutes until firm. Spreak top of 4th layer with buttercream, and use as base of cake on platter.

Place chilled, ganache coated layer atop buttercream layer, chocolate-side down. Frost top of layer with buttercream, and repeat with remaining layers.  Frost entirely with buttercream, and chill until set.


Spread ganache over buttercream. Garnish with slivered or chopped almonds, hazelnuts, or chocolate curls and piped buttercream if desired. Refridgerate at least 3 hours before serving. Slice with a wet (! - yes, it works perfectly!) knife into 12 slices. Keeps well for 3-4 days.


The recipes I've shown above are for a reduced amount of sugar that I think will better highlight the flavor and amazing textures of this dessert. But it would be amazing with any number of combinations of filling and frosting flavors, so I plan to make this again and get creative with the layers.

Friday, January 18, 2013

Black-Eyed Pea Cakes Bring Good Luck

Black Eyed peas are a traditional Southern dish to eat on New Year's Day, as they are supposed to bring good luck. I have sought out recipes for the occasion in the past, but wasn't going to bother this year as I was busy with more important cake baking. However, this recipe popped up in my feed and it looked so simple and I already had most of the ingredients that I decided I had to try it.

I highly recommend that you look at Rashmi's page because she has great photos and instructions. I used slightly less than one cup of beans but the same amount of other spices, plus extra parsley along with the cilantro. I made mine into patties instead of balls, and the recipe yeilded seven 2-3" patties. The flavor and texture were both excellent. I am certain that the secret to these guys staying together while frying was that the beans were not pre-cooked, just soaked. Whenever I have tried to fry bean patties before, it is has been with cooked (or canned! which I know doesn't work) beans, and they just fall apart. I'm so glad to see that the trick is in soaking the beans and then just pureeing them without cooking.

For dipping, I made a quick sauce of plain greek yogurt, a bit of curry powder, and a couple dashes of hot sauce.


May these bring us lots of good luck and great fortune!

Friday, January 4, 2013

Pear Flake Cake for New Year's Day

I made this cake for a New Year's Day afternoon gathering of friends with little kids. The snowflake shape of the cake was both fun and seasonal. Because of the attractive shape, it doesn't need frosting so it's easier, less chance of 2 year olds smearing buttercream on the furniture, and light enough for an afternoon treat without necessarily feeling like dessert. 
 
I used the applesauce cake recipe that I've made previously, but substituted homemade pear sauce that I'd made with bartlett pears. I baked the full recipe in my snowflake shaped pan, which was a little risky for a couple of reasons: it is often difficult to get cakes out of the shaped pans in one piece! And because this recipe was intended to be baked in two round pans, baking all the batter together might result in the inside not cooking through or the outside getting dry. That is a bit what happened, as one friend who ate from the middle told me it was a little underdone, though she claimed that was a positive "feature."

I drizzled it with white chocolate glaze and sprinkled with some Swedish pearl sugar. I like the flavor of the cake a lot, though if I try to bake it in this pan again, I will only fill it half-full so that it can bake through completely without getting overdone.


Pear Sauce
makes 2 cups
2 large, ripe Bartlett pears (about 1 pound)
3 tablespoons water
3 tablespoons sugar
1 cinnamon stick
4 allspice berries
1/2 chunk fresh ginger
Peel, core and chop fruit into 1/2 pieces or smaller. Mix with remaining ingredients in heavy saucepan, cover, and simmer until fruit is very soft, 20-25 minutes. Remove spices and puree fruit with an immersion blender until very smooth. Continue to heat uncovered at a simmer, stirring regularly to prevent burning, until consistency is thick.

Pear Sauce Cake
adapted from Warren Brown
5 ounces unsalted butter, softened
15 ounces sugar
3 eggs
12 ounces all-purpose flour
1 1/2 teaspoons baking powder
3/4 teaspoons salt
1/4 teaspoon cinnamon
1/8 teaspoon freshly grated nutmeg
1/8 teaspoon ground allspice
1/2 cup milk
1 cup pearsauce (see recipe above)
1 1/2 teaspoons vanilla

Preheat oven to 350. Grease and flour two 8-inch round cake pans, preferably with removable bottoms (or line pans with parchment).

Combine butter and sugar in stand mixer and beat until well creamed. Beat in eggs one at a time.

Mix together milk, vanilla, and apple butter in one small bowl, and dry ingredients separately in another bowl. Add to butter mixture alternately in 3 additions. Divide evenly between prepared pans and bake 30-35 minutes, until tops are golden and start to pull away from sides of pan. Cool in pan 15 minutes, then invert to racks and cool completely.

White Chocolate Glaze
3 ounces white chocolate
1/2 cup cream

Heat cream to simmer. Chop chocolate. Pour cream over chocolate and allow to rest one minute, then stir until smooth. Cool slightly, then use as a drizzle, or chill and spread over cake. Keeps in the fridge for 2 weeks or in the freezer. Delicious eaten cold with a spoon!

Saturday, December 29, 2012

Black Walnut Cookies

I had purchased two packages of black walnuts in preparation for my father-in-law's birthday last August (to make ice cream), and used less than one package. Christmas seemed like a good time to dip into the nut reserve and prepare another gift for him. I looked for cookies using black walnuts and found two recipes that I thougth would make a good holiday gift: one is a drop cookie that sounds good but is probably just a bit more rustic, and the slice-and-bake version that I decided to make was just what I had in mind both for a tasty treat and an attractive accompaniment to a cookie platter. I'm really pleased with my selection, as was Will. These guys are pretty with their flecks of nuts and golden brown color, and are a perfect Christmas cookie with a crispy snap and buttery texture. I said to Will "they would be great if it weren't for that black-walnut taste" because I do find the metallic-y bitterness of American walnuts to be off-putting. But I found it significantly tempered in these cookies as compared to in the ice cream, and didn't seem to have any trouble consuming a fair stack. And since Will and his dad especially enjoy black walnuts, these really were an excellent recipe. They were great on my cookie platter.


Black Walnut Cookiesfrom Taste of Home
1 cup butter, softened
2 cups packed brown sugar
2 eggs
1 teaspoon vanilla extract
3-1/2 cups all-purpose flour
1 teaspoon baking soda
1/4 teaspoon salt
1 1/4 cups chopped black walnuts

In a large bowl, cream butter and brown sugar until light and fluffy. Beat in eggs and vanilla. Combine the flour, baking soda and salt; gradually add to creamed mixture. Stir in walnuts.
Shape dough into two 15-inch rolls. Wrap each in plastic wrap. Refrigerate for 2 hours or until firm. (After chilling, dough can be frozen, and sliced/baked without defrosting.)
Unwrap dough; cut into 1/4-in. slices. Place 2 in. apart on greased baking sheets. Bake at 300° for 12 minutes or until lightly browned. Remove to wire racks. Yield: 10 dozen

Wednesday, December 26, 2012

Buche de Noel

Ever since I received The Cake Bible for my 30th birthday, I have wanted to make a Buche de Noel ("yule log"). I had seen the cakes every holiday season in bakeries, including in our neighborhood Danish bakery (though a buche is a traditional French cake), but it wasn't until the recipe was before me that I became rather fascinated with it. I haven't made any type of cake roll, which should be a fairly straightforward experience albeit for the final decorating to transform the roll into a felled woodland tree.

What finally brought me around to the cake this year was my inital plan to make a chestnut and chocolate cake from chestnut genoise and chocolate ganache. That recipe required chestnut flour. The first online retailed for all-things-chestnut is actually in Washington state, but shipping costs still add up, and the products, while "local" don't seem to be available in stores. The only place I could find chestnut flour without having to pay and wait for shipping was the Italian specialty market which imported the flour from Italy!

With that recipe in mind, but needing some adjustments, I decided to swap the cake and filling flavors and make a chocolate genoise with a chesnut filling. Fresh and canned chesnuts, while still a bit more expensive than other more common ingredients, are pretty readily available in December. Trader Joe's had vacuum-packed chesnuts and canned chesnuts are at the grocery store. Chocolate genoise with chesnut creme are the two primary components to a yule log, so rather than stacking them atop each other in rounds for a more traditional cake, I just needed to spiral them up with each other and decorate like a forest.
My only other experience with preparing chestnuts had been when a few years back when I roasted a goose and made chestnut stuffing as an accompaniment. Because I had started with fresh chestnuts, and recalled the arduous process of cutting through their tough outer shells and painstakingly picking away their inner skins, this year when I saw a package of peeled, vacuum-sealed chesnuts at Trader Joe's, I bought it without even knowing how I would use them. Once I landed on this dessert recipe, I went back for more but alas they had already sold out. They did have fresh chestnuts though, and like a mama who wants another baby but held off due to the pain of labor, I thought to myself, "c'mon, how bad can it be?"

Don't be scared away from this process, or by the ultra-glamourous final cake! It is not difficult and it is completely worth the effort!


I was worried that cutting through the shell would be the hardest part, followed by concern that some would burn before they popped open. In fact, they all opened beautifully, but they must have been old or travel-weary because they came swiftly out of their shells but held firm and enmeshed with their skins. I ended up wasting almost half the batch because I had to cut off the skin rather than peel it away. And chestnuts are shaped like little brains, all twisted on themselves and convoluted around the skins so you can't just shave off the outer layer, you have to dig and gouge to remove the bitter exterior. SUCH A PAIN. So, 2 1/2 hours later, I am documenting how unfortunate a process I find peeling chestnuts to be, so as to remind myself to not attempt it again. I've given it two chances, and now feel safe in justifying to myself the expense of whatever variety I can find that are already past this stage in their processing.

The first thing to do with the raw chestnuts is make them into a puree. The recipe said either canned or fresh would work, and gave separate instructions for each. It also cautioned against using canned puree which would be too moist and perhaps also too sweet, though I am interested in trying that as well - maybe after cooking it down a bit to thicken. In any case, Rose says to cook fresh roasted chestnuts in milk until "easily pierced with a fork." Since the vacuum-packed chesnuts were not that tender, I cooked them together with the roasted ones.

Once they are cooked, drain them and puree in the food processor. It was hard to know what consistency to make the puree. The recipe said to add the cooking milk if the mixture was too dry, but what was too dry? After extensive processing, the mixture still seemed pretty "dry" and crumbly, so I ended up using at least a 1/2 cup of the simmering milk - maybe more - and went for a texture about like peanut butter (though not as sticky!)

All of this I did on Saturday, for Christmas on a Tuesday.


On Sunday, Will helped me make marzipan mushrooms to decorate the finished cake. His were larger and more elaborate than mine, which I technically considered "better," but in the end it was nice to have two different "varieties" in our woodland forest. We watched a video online for how to sculpt them, but that was unnecessary as it is pretty straightforward: roll a small piece of marzipan (purchased from Larson's Bakery!) into a ball, use your little finger to hollow out a depression for the stem, spread the crown into whatever shape you desire, use the back of a knife to impress gills into the underside of the top, roll another little piece of maripan into a cylinder for the stem, and press into the top of the mushroom, then dust/smudge cocoa powder.

Monday afternoon, I baked the genoise. It is not actually a genoise, as it has no flour; it's basically just eggs and chocolate! The recipe says that its texture is perfect for rolling, as it is crack-resistent. Since I have not made a jelly roll before, I don't have a basis for comparison, but I did find this pretty easy to work with (discounting my anxiety level of course!) The instructions also call for covering the baked roll with a damp dish towel immediately after removing from the oven, and until it is completely cool. I left it that way untouched until Tuesday morning with no apparent ill effects or deterioration of quality.


Tuesday, Christmas morning, I made the chesnut filling. It was as simple as whipping creme and stirring in my already-prepared sweetened chestnut puree. I used two cups of heavy cream and 1 cup of puree, which made at least double what I needed to generously fill the roll. I ended up using it to frost as well, which had not been my original plan, and still had over a cup leftover. But it was a tremendously delicious ratio of light airy cream, sweetness, and roasted nuttiness. 


Finally came assembly. This whole process (minus the fresh chestnuts) was actually pretty smooth. I thought a lot about my decorations, which was time consuming, and I was very worried about how the rolling of the cake layer and the stacking of the trimmed log would go, but it all went quite well. Once the cake was rolled, I wrapped the parchment firmly around it, and refrigerated for another hour. My intention had been to frost it with dark ganache, and decided to crumb coat with the chestnut cream. Because of the texture of the chestnuts in the cream, it made what I thought was a lovely, woody-barky look and didn't want to cover it up with ganache which just would have ended up looking lumpy.


I had made chocolate bark that I was going to apply on the ganache, but with my "birch" tree, the bark served its role better when we tore it into thin pieces.  Some washed greenery and pinecones from our yard, along with our marzipan mushrooms and a dusting of powdered sugar snow completed our buche de noel.


I was SO pleased with how it looked! It came out much more lovely than I was hoping; even prettier than some of Martha's (and much more than Rose's). But, more importantly, it was so So SO delicious. It was the perfect ending for a Christmas dinner, because it was unfathomably light, and yet super-chocolately. The chestnuts impart the most wonderful earthy, wintery flavor but it is sweet and nutty and rum-y especially next to the chocolate. I cut thin slices, just about 1" thick, and most people had two servings, but it was completely satisfying, and there was enough for four of us to have leftovers the next day; I am happy to report that this cake tasted exactly as good on day 2... it did not get soggy or dry. The "cloud roll" is aptly named, because it does taste ethereal.

I am looking forward to making another buche de noel next year, now that I have some confidence about the process. And while these recipe components absolutely deserve to be repeated, I am curious to try different flavors next time - either a chesnut cake with chocolate frosting, or other combinations. If you have any comments about buches that you've made or eaten in the past, I'd love for you to post them, or let me know if you have questions or fears about making your own, because this should not be a daunting recipe and the results are truly spectacular.


Chocolate Cloud Roll
from The Cake Bible, by Rose Levy Beranbaum

1/4 cup + 2 tablespoons sugar (78 grams)
6 large eggs, separated (112 grams yolks, 180 grams whites)
113 grams bittersweet chocolate, melted - I used lindt 70% dark
3/4 teaspoon cream of tartar
1 tablespoon unsweetened cocoa for dusting

Prepare a 17x12" jelly roll pan with parchment. Grease and flour. Preheat oven to 350.
Beat together 1/4 cup sugar and yolks until fluffy. Add chocolated.
In a separate bowl, beat egg whites until foamy, add cream of tartar and beat until soft peaks form. Add remaining 2 tablespoons sugar and beat until stiff peaks form.
Fold whites into chocolate mixture until incorporated, careful not to deflate the batter.
Pour batter into prepared pan and spread evenly. Bake 16 minutes. As soon as you remove the cake from the oven, dust evenly with cocoa, and cover with a clean, wet dish towel. Aloow to cool completely.

To roll, use parchment as handles to pull cake from pan onto hard flat surface. Spread with filling then use parchment to roll up the long edge.

Chestnut Mousse Cream
from The Cake Bible by Rose Levy Beranbaum
makes 5 cups, which is more than enough to fill and frost a jelly roll

1 cup unsweetened chestnut puree (it is possible to make your own, but I think that is by far the hardest part of the recipe - though it can also be completed well in advance. I suggest looking for canned puree, or at least use canned or vacuum-sealed chestnuts.)
2/3 cup powdered sugar, lightly spooned into measuring cup
2 tablespoons dark rum
2 cups heavy cream

Process puree with sugar and rum.
Beat cream until soft peaks form. Add puree (I spooned it into about 7 chunks) and continue beating until stiff peaks form. Spread on cake and roll into spiral. Chill until firm.

To assemble Buche de Noel
The finished roll should be the long-edge of the cake pan, about 17". Slide roll on a diagonal into two pieces, about 12" and 5". Slice 5" piece in two, again on a diagonal to make the "branches." Because the cake is so soft and light, the branches should affix to the main trunk fairly securely using just the cream filling or some chocolate ganache frosting. Decorate as desired using chocolate bark, holly, cedar or pine springs, pine cones, marzipan or meringue mushrooms and other forest critters, a santa, bows, candies, and for sure some powdered sugar snow!

Keep refrigerated until about an hour before serving. We found this to keep very well for over 24 hours.



Saturday, December 22, 2012

About my blog


Sometimes a number is big and sometimes a number is small, even when it is the same number. For example, 10 kittens that need homes is a lot, but 10 cents you find on the sidewalk is not. $10,000 as an annual salary in the US is a little, but 10,000 hits on a my first-ever totally amateur blog is a lot. Well, it's a lot to me. I'm kind of excited about it, and kinda proud (though I'm still not sure exactly how many of those pageviews are my own... I constantly specify "do not track my page views" but the host never gives any affirmative confirmation that this request has been understood.) Of course, I've been watching it tick upwards from 9,700 to 9,800 to 9,900 over the past couple of weeks and trying to figure out what I could do to celebrate. I didn't really decide on anything specifically, so I am just creating what I happened to be doing on this day that 10K was reached into my celebratory post.

My time in the kitchen today was devoted to preparing for a small holiday party I'm having tomorrow. Of course there was baking lots of cookies, but I also decided to make a couple of dishes that not only have I made in the past, but which I served together. That is pretty rare for me, because I love trying new recipes, and even with my favorites, I try to combine them into fresh new menus. Maybe I'm just tired from the push of the end of the quarter and the stress of the holiday rush on Will's business, but more likely it's just that the reasons I served this soup and salad together before are great reasons to do so again.

First of all, soup is great for a party because you can make a lot all at once, and have it ready in advance so it just bubbles away on the stove while you visit with your guests. Even when your friends are as radiant and sparkling as mine are, soup adds a much-needed warmth to the damp, dark days of Seattle winter. I settled on this particular pairing for this occasion because of their festive, colorful ingredients.  

But what I'm more pleased about than these recipes, is the fact that pulling them from my archives is precisely the experience I wanted and was planning for when I started this blog. While I am super-thrilled to have many viewers of my site (shall I reiterate, it's 10,000 page views as of today, so there must be more people reading than just my beloved 11 "followers!"), this blog is really for me. It helps me chronicle my tests and trials so I can keep track of recipes that worked - and didn't. It gives me a place to store recipes I like - but want to improve. It reminds me what cakes I've made with which frostings and which fillings and how long in my oven it takes to get the cookies just the right color. 

You might be interested in my comments in the post for the cauliflower salad. But I FOR SURE am interested! I remembered really enjoying these two recipes, but by coming back to my post about them, I can easily see what I want to do to make them better for this time. 

Here are what few little changes I made the second time around.

Red Lentil Soup
I left out the potato that I added unnecessarily in the first iteration. I remembered the lemon, and also remembered some garnishes of greek yogurt and fresh parsley.


Cauliflower Salad
I skipped the glaze entirely. Half the curry dressing was the right amount for my one large head of cauliflower (and half a large leek).
I followed my suggestion to make the florets much smaller, and the bell peppers larger. And I swapped around a couple of ingredients based both on what I have in the pantry and what is seasonal.
Red and green bell pepper, sunflower seeds, dried cranberries. And lots and lots of cilantro.


Wednesday, December 19, 2012

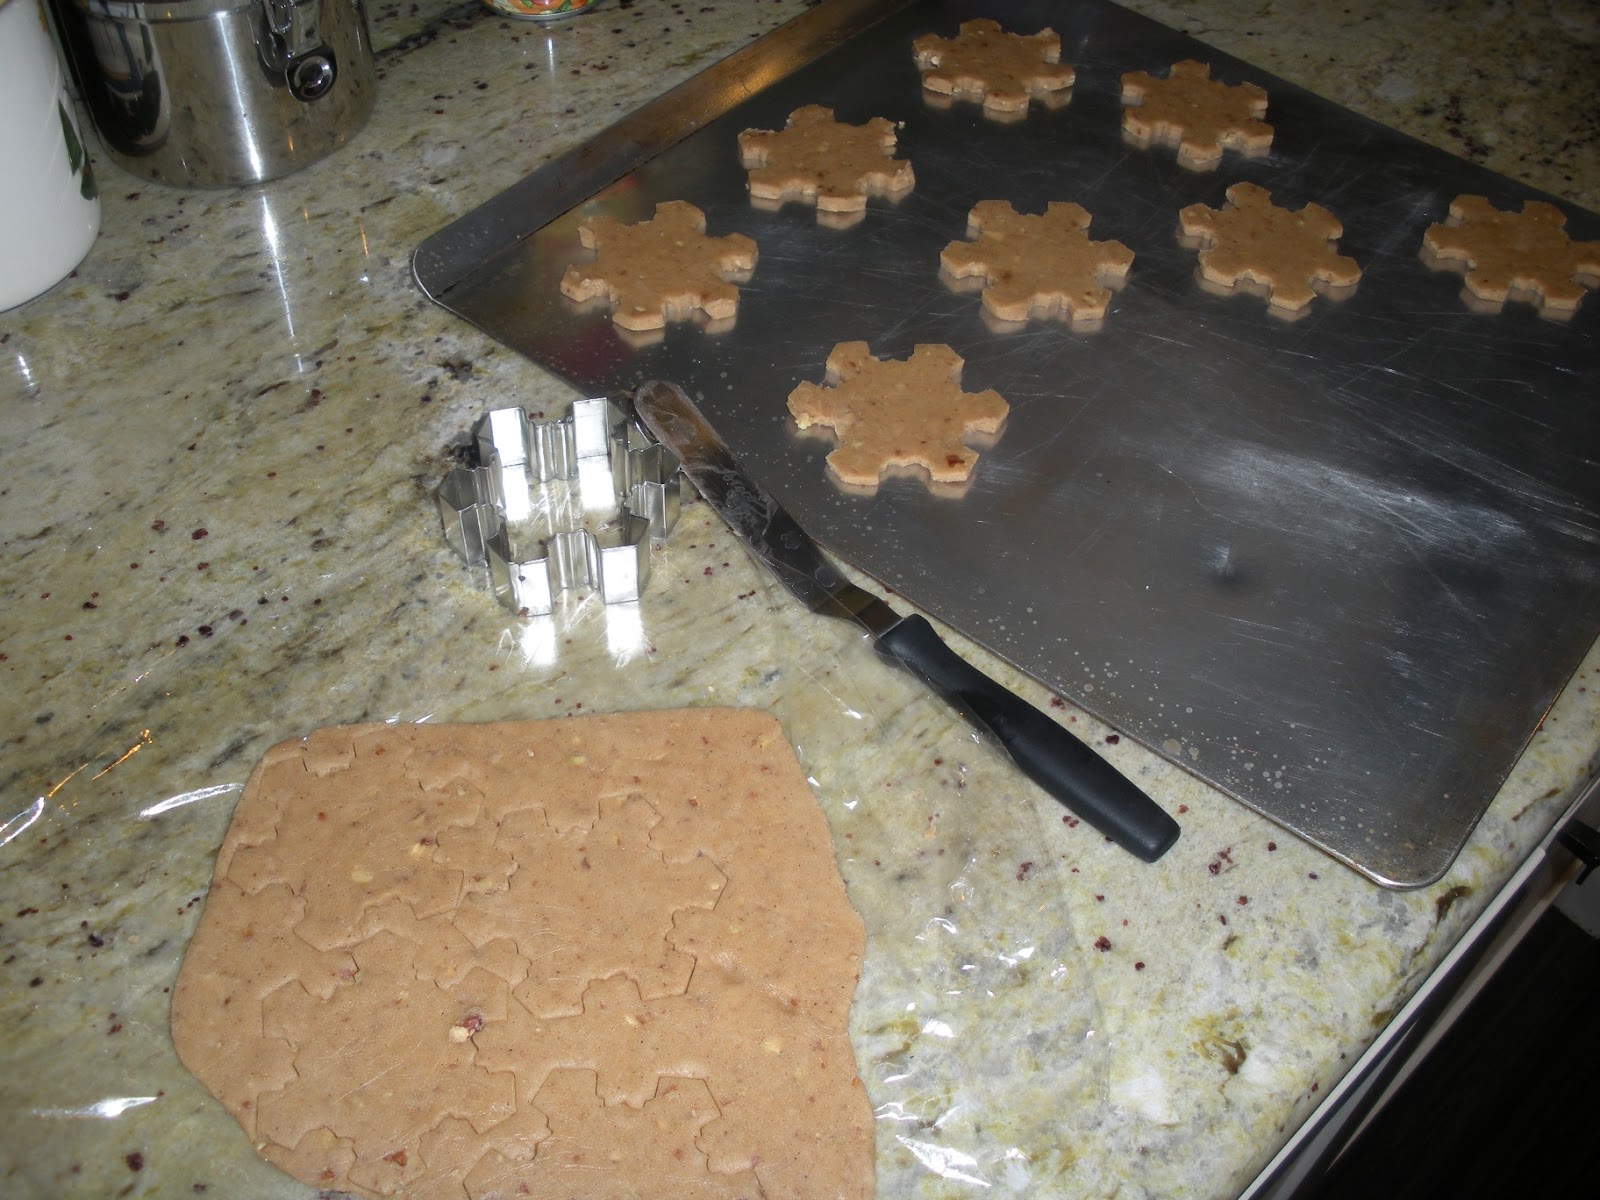
Santa's Whiskers and Speculaas Snowflakes

Both of these recipes are new to me this year, and I came across them just toward the end of November and knew I wanted to try them for the holidays. Turns out they make a delightful cookie platter pairing, because they have such contrasting colors and flavors.

Both the author and the reviewers of the Santa's Whiskers cookies are quick to make disclaimers about "don't be turned off by the candied cherries" etc. I glazed right over this warning because I love fruitcake at the holidays and have no negative associations with candied fruit. I am less of a fan of coconut, generally steering away from it while not explicitly avoiding it. But I can assure you whatever your position on any of these ingredients, these cookies are the perfect crisp of Christmas and everyone will love them. They are adoreable, and unmatched in the festive cheer of red and green stained glass they bring to any cookie platter.


Santa's Whiskers
adapted from Sara Bonisteel on epicurious

3/4 cup (2 ounces) flaked sweetened coconut
1 cup (2 sticks) unsalted butter, room temperature
1 cup sugar
2 tablespoons whole milk
1 teaspoon pure vanilla extract
2 1/2 cups all-purpose flour
3 ounces red candied cherries, coarsely chopped
3 ounces green candied cherries, coarsely chopped
1/2 cup (2 ounces) coarsely chopped pecans


In the bowl of a stand mixer fitted with the paddle attachment, combine butter and sugar and beat until light and fluffy, about 2 minutes. Add the milk and vanilla and beat until fully incorporated. With the mixer on low, add the flour in 3 batches, followed by the red and green cherries and the pecans, and stir until just combined, about 2 minutes.

Spread coconut down the middle of two 12" long pieces of waxed paper. Divide the dough in half and form each half into a 10-inch-long log, about 1 1/2 inches in diameter. Transfer each log to a sheet of wax paper and roll to coat them completely with coconut. Wrap in plastic wrap and chill for at least 1 hour or up to a week. You can also freeze the logs and defrost before slicing.


Preheat oven to 375.


Slice each log crosswise into 1/4-inch-thick cookies and arrange on greased or lined baking sheets, leaving about 1 inch between cookies. Bake until light golden brown, about 12 minutes. Cool the cookies on the baking sheet for 10 minutes before transferring to a wire rack to cool completely. 
Note: my cherries were in a sticky glaze that dyed my first batch pink. Rinse or blot the fruit to remove as much of any extra glaze as possible if your fruit is not dry to begin with.

These make really sweet goodie bags for gifts.

When Will and I had the opportunity to travel extensively in Western Europe last year, one of the many things in which we delighted was tasting the pastries and baked goods of each region. Our point of entry and departure was Amsterdam, and the Dutch are famous for their speculoos (also speculaas), a crispy almond and spice cookie. I love this type of cookie on any day, but I think it had a special appeal for me because it was our "first" treat when we launched our European adventure. While we couldn't get good speculoos cookies once we left The Netherlands, we continued to enjoy speculoos gelato across Belgium, France, and Italy.

Ginger and spice cookies are often part of my holiday year-round baking repetoire, but speculoos are a rolled cookie which makes them a bit more delicate and more evenly crunchy. They are also incredibly festive since you can cut them out with all your adorable cookie cutters.

I followed this recipe exactly as it appears from Nancy Leson, with one important change: I used pecans instead of almonds, because that is what I had. Pecans aren't really used in European recipes, but they perfectly complement the spiced flavor of these cookies,  and the texture of the cookies is still as crispy and delightful as what I remember from almond versions.

Wilma Eppinga's Speculaas Koekjes(Dutch spice cookies)Makes about 6 dozen1 cup dark brown sugar, firmly packed
3 tablespoons whole milk
3 cups all-purpose flour
½ teaspoon baking powder
½ teaspoon table salt
1 ½ teaspoons cinnamon
¾ teaspoon ground ginger
1 ½ teaspoons ground cloves
¾ teaspoon grated nutmeg
1 ¼ cups unsalted butter, at room temperature
½ cup sliced almonds

In a small bowl, combine the sugar and milk; stir until smooth.
In a large mixing bowl, sift the flour with the baking powder, salt, cinnamon, ginger, cloves and nutmeg, then add the butter, blending until mixture is like cornmeal.
Add the sugar mixture and almonds to the flour mixture and blend thoroughly. Using your hands, shape the dough into a ball, slice it in two and flatten into disks. Cover with plastic wrap and refrigerate until thoroughly chilled (at least an hour, though the flavors meld better if left overnight).
On a lightly floured surface, roll out dough to ¼ inch thickness and use a (floured) 2- to 3-inch cookie cutter to make shapes. Place on greased cookie sheet (or use parchment or a silicone mat). Bake in a preheated 350-degree oven for 10 to 15 minutes until browned. Cool on rack to crisp.