Tuesday, October 20, 2015

Pear Birthday Cake

For a milestone birthday a number of years ago, I first made this pear cake and it has been a standout in my memory ever since. I am always curious about people who say their favorite cake is carrot, and if they really just mean they like moist spice cakes. Pear is such a great flavor and texture and to me is far superior and more original than carrot cake and I love to incorporate them in baking. 

The original pear cake


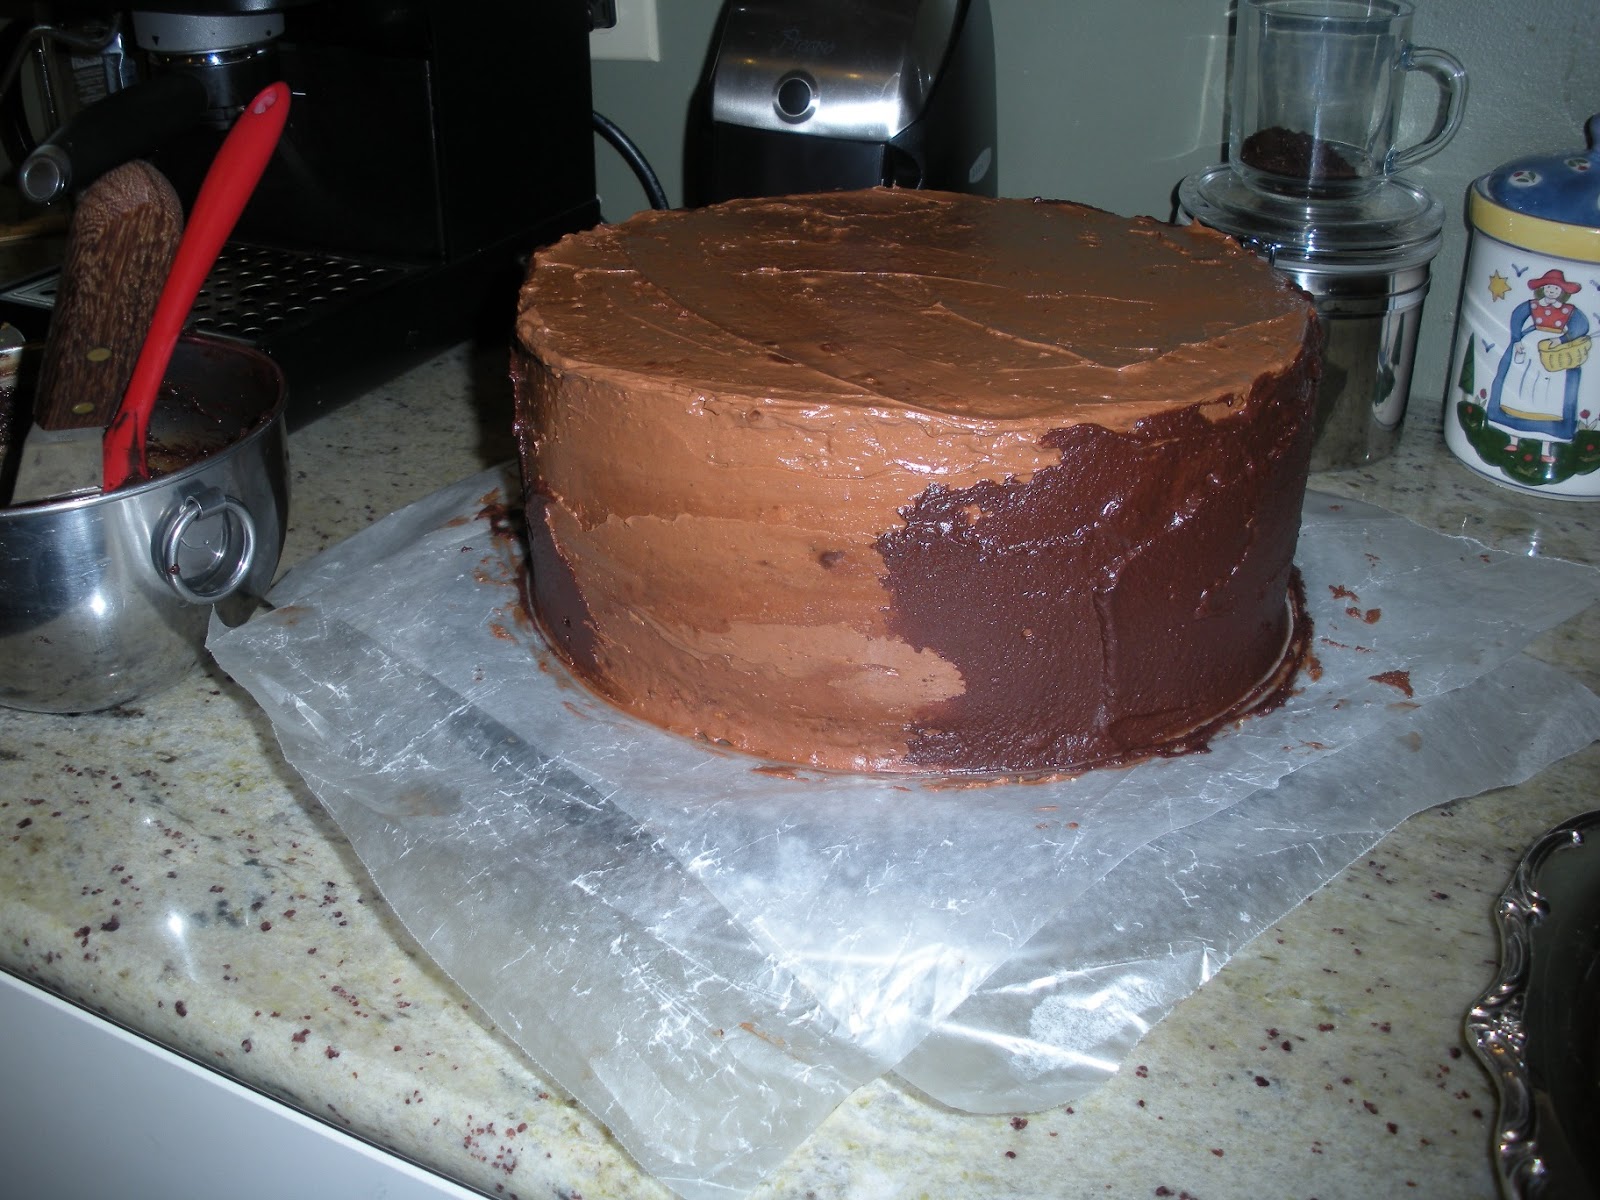
I was looking through new fall cake recipes and came across a pumpkin version that I thought would work well with a pear substition. I am thrilled with the exceptional three layer cake that resulted, which is moist and dense without being heavy. I used a very sweet cinnamon filling, but the frosting itself is a light and smooth buttercream flavored with caramelly browned butter. Absolutely Fantastic!


Spiced Pear Cake with Browned Butter Frosting

Inspired by Fine Cooking

For the pears
2 large ripe bosc pears, peeled, cored, and pureed 


For the cake
6 oz. (3/4 cup) unsalted butter; more for the pans (4.5 ounces browned butter)
9 oz. (2 cups) unbleached all-purpose flour; more for the pans
1-1/2 tsp. baking soda
1-1/2 tsp. ground cinnamon
1 tsp. ground ginger
3/4 tsp. table salt
1/4 tsp. ground cloves
1-1/2 cups granulated sugar
2/3 cup firmly packed light brown sugar
2 large eggs
1/3 cup buttermilk

1 1/2 cups pear puree

For the frosting
8 oz. (1 cup) unsalted butter
16 oz. cream cheese, at room temperature
1/2 cup firmly packed light brown sugar
10 oz. (2 1/2 cups) confectioners’ sugar
2 teaspoons bourbon (optional)


Make the cake

Position a rack in the center of the oven and heat the oven to 350°F.

Butter and flour three 8-inch round cake pans with removable bottoms (or line the bottoms with parchment, butter the parchment, and flour the pans).  Can also use two 9-inch pans and bake 28 minutes.

Melt the butter in a heavy-duty 1-quart saucepan over medium heat. Cook, swirling the pan occasionally until the butter turns a nutty golden-brown, about 4 minutes. Pour into a small bowl and let stand until cool but not set, about 15 minutes.

In a medium bowl, whisk the flour, baking soda, cinnamon, ginger, salt, and cloves. In a large bowl, whisk 1-1/2 cups of the pear purée with the granulated sugar, brown sugar, eggs, and buttermilk until very well blended. With a rubber spatula, stir in the flour mixture until just combined. Gently whisk in the brown butter until completely incorporated. Divide the batter evenly between the prepared pans.

Bake the cakes until a tester inserted in the center comes out clean, about 25 minutes. Let the cakes cool in the pans for 10 minutes. Turn the cakes out onto racks, remove the pan bottoms or parchment, and cool completely.


Make the frosting
Melt the butter in a heavy-duty 1-quart saucepan over medium heat. Cook, swirling the pan occasionally until the butter turns a nutty golden-brown, about 4 minutes. Pour into a small bowl and let stand until the solids settle at the bottom of the bowl, about 5 minutes. Carefully transfer the bowl to the freezer and chill until just firm, about 18 minutes. Using a spoon, carefully scrape the butter from bowl, leaving the browned solids at the bottom; discard the solids.

Using an electric mixer, beat the butter, cream cheese, and brown sugar on medium-high speed until light in color and the brown sugar has dissolved, 2 minutes. Gradually beat in the confectioners’ sugar and continue beating until fluffy, 1 to 2 minutes.


Assemble the cake. Garnish with candied spiced pumpkin seeds, dried cranberries, chopped crystallized ginger, or other festive fall decorations.


Note that for the cake pictured above, I used my favorite cinnamon buttercream as the filling between the layers and half a recipe of the browned butter frosting for the exterior. This obviously is extra work (unless you keep frosting on hand in the freezer like I do!) but I loved it. LOVED it. The cinnamon frosting would be too sweet to use alone, because the cake is sweet as well. The buttercream would be excellent as both frosting and filling. Though it uses 2:1 cream cheese to butter, the consistency is much smoother and more like a standard buttercream than the typical stickier cream cheese frosting. 

Saturday, October 3, 2015

Apple Kuchen

This beautiful apple kuchen was featured as a Rosh Hashanah article and I just loved the technique with the apples. They aren't slices, but are cut just part-way through so that they fan when baking. 

I took this to a brunch gathering. It's very sweet from the honey glaze, even though I only used about half of what the recipe called for. The cake itself is dense, and very gingery which I love but some people might feel lis overkill. I will definitely use apples sliced this way in the future, whether or not I use this exact recipe again. 

Though the recipe called for lemon, I only had orange, so I substituted orange zest and juice. The baby gala apples I used were just right in both size and texture. Ultimately, mine needed 15-20 additional minutes (after 45), even though my oven is hot and was close to 350 for most of the time. 

For the cake:
½ cup unsalted butter (1 stick), plus butter for greasing pan
1½ cups all-purpose flour, plus flour for dusting pan
½ cup sugar, plus 1 tablespoon for sprinkling apples
¼ cup raw honey
3 eggs
1 tablespoon grated ginger
2 ounces candied ginger, diced
½ teaspoon grated lemon zest
½ teaspoon salt
2 teaspoons baking powder
3 small apples, peeled and quartered

For the glaze:
¼ cup sugar
¼ cup honey
3 tablespoons lemon juice

Preheat oven to 325. Butter and flour a 9-inch cake pan (springform pan or removable bottom).

Cream together butter and sugar, then add honey and whip for one minute until fluffy. Beat in eggs one at a time, until well incorporated, then whip for two minutes.

Stir in grated ginger, candied ginger, and lemon zest.

Whisk together flour, salt, and baking powder. Blend in with wet ingredients to make a stiff batter. Pour batter into prepared pan.

Cut slits in each of the apple quarters on the rounded, outer part of the wedge, slicing partway through at 1/4-inch intervals. Arrange apple quarters slit-side-up over the batter and sprinkle surface with 1 tablespoon sugar.

Place cake pan on a baking sheet and put on middle rack of oven. Bake for about 45 minutes, or until an inserted skewer emerges dry. If cake is browning too rapidly, tent with foil until done.

Cool on a rack, then carefully unmold.

Make the glaze by bringing sugar, honey, and lemon juice to a boil and stirring until sugar is dissolved. Paint surface of cake and apples with warm glaze. Cake will keep for several days, tightly wrapped, at room temperature.

Tuesday, September 29, 2015

Double Chip Cookies

These cookies bake out thin and chewy but crispy around the edges. Take out of oven when golden but still puffed and they'll cool to a craggy deliciousness. I'd like to try with just chocolate chips and see if it works as my new go-to-recipe.


3/4 cup butter, softened
1 cup white sugar
1/2 cup light brown sugar
2 teaspoons vanilla
2 eggs
2 cups flour
2 teaspoons baking soda
1/2 teaspoon salt
10 ounces peanut butter chips plus 8 ounces chopped milk chocolate bar (try 16 ounces semi-sweet chips or chunks)

Preheat oven to 350. 
Cream butter and sugars.
Mix in eggs and vanilla.
Combine dry ingredients and blend in. Stir in chips. Drop by large teaspoonsful on ungreased baking sheet, leaving room to spread. Bake 12-14 minutes. Cool on sheet before transferring to rack to cool completely.


found at food.com

Sunday, August 30, 2015

Nectarine Crisp


Served with brown sugar-cinnamon ice cream
Preheat oven to 375.  Butter a deep dish pie plate or 2 quart baking dish.

Topping
3/4 cup flour
1/4 teaspoon fresh ground cardamom
1/4 teaspoon ground ginger
1/2 cup brown sugar
2 oz marzipan or almond paste
6 tablespoon cold butter
1/4 sliced or chopped almonds
1/2 cup quick cook oats.

Pulse the flour, spices, and sugar in a food processor. Add marzipan and butter and pulse until pea sized clumps form. Mix in with almonds and oats with your hands or a spoon.

Fruit
About 2 pounds nectarines, sliced ~1/4 thick
1 tablespoon flour
1/2 cup sugar (I used Splenda)
1 teaspoon fresh grated ginger

Toss fruit mixture until well combined. Layer into pie plate. Squeeze clumps of topping into coarse chunks and spread across top of fruit mix until fully covered. Bake 35-40 min at 375. Cool on a rack and serve warm or at room temperature.

Friday, August 28, 2015

Brown Sugar Ice Cream

I got the idea for this ice cream from the amazing cinnamon frosting that is flavored with brown sugar, and from the fact that I finally feel I have a "go to" ice cream base recipe, and I was ready to start playing with it. 

I took it to friends for dessert after a Sunday evening barbeque. The last time I'd offered to take dessert to share with them was on Fourth of July and my ice cream mixer wasn't completely frozen so the ice cream never set. We still poured it over apple pie, but needless to say I was disappointed. Having good ice cream to make up for that experience was essential, but this recipe far surpassed "good" and I'm making it again for my father-in-law's birthday to serve with a nectarine tart.

Another thing I tested with this recipe was a shortcut to the process. Instead of heating all the cream and milk in the process of tempering the eggs, I only used some so it wouldn't take so long to get to temperature. I didn't notice any difference in the final product so this will be my new procedure.

Ingredients
2 cups whipping cream (I use 30% butterfat)
2 whole eggs (room temperature) 
1 cinnamon stick
3/4 cup dark brown (or light brown) sugar
1 cup milk (I use skim, but any type is fine)
1 teaspoon vanilla
1 tablespoon dark rum

Heat cream and sugar over medium heat until simmering and sugar is completely dissolved. 

In a separate bowl, mix eggs until blended. Add a few tablespoons of hot cream mixture to blend, and bring slowly up to temperature, then gradually stir egg mixture into hot cream over medium heat until it reaches 165 degrees. Remove from heat. Stir in milk. Lay plastic wrap on the surface of the liquid and chill overnight. 

The next day, remove cinnamon stick from mixture and stir in vanilla and rum. Freeze according to your ice cream maker's instructions. 


Sunday, February 1, 2015

Eggnog Cake

The next evening, I made a cake for another holiday party, and decided on an Eggnog cake that had just appeared in the Seattle Times. I love eggnog, and this was a party at my grandmother's elder home, so the mildly-throwback-ness of eggnog seemed appropriate. I had also decided I wanted to use my other shaped pan, a snowflake, and believed the pound-cake-esque loaf recipe would do well in the pan, holding it's shape as well as releasing from the mold. On this point, I was exactly right. The cake inverted painlessly, maintaining all the lovely details of the showy snowflake shape in golden-crumbed glory. For a frosty presentation, I merely dusted with powdered sugar and a light sprinkling of white sugar granules.

I ended up initally rather disappointed with the cake, I did like the gently-spiced, buttery flavor, but I found it quite dry, and was surprised the recipe hadn't called for a light glaze, or brandy-laced whipped cream. While those would unquestionably be exceptional accompaniments under any circumstances, I don't think it was just my imagination that this cake aged well, becoming moister and more flavorful the next day.  I will probably  make this again, and even confidently bring out a shaped pan in which to bake it, I will probably try a thin glaze, or maybe even a light brandy soaking syrup, and serve with whipped cream or hard sauce.

Made as called for in a loaf pan with an eggnog glaze of 1 tsp eggnog whisked with powdered sugar.

Baby Carriage Cake

I did have the perfect opportunity this very weekend in my offer to make a baby shower cake for a friend. I had already determined I wanted to make a cake with champagne. What better way to celebrate the joy of a new baby than to pop open a bottle of bubbly, and what more responsible way for a pregnant mama to enjoy said effervesance than to bake away the alcohol. I hadn't yet crafted a visual for this cake though, so after I formulated my plan, I realized my design could easily incorporate two different kinds of cake. What to do for cake #2? The standby favorite go-to white cake!


The parents decided not to find out the baby's gender, so the design
for this cake incorporated a pink and blue question mark.

The champagne cake is really something quite remarkable. I have made one before, but the recipe I used this time was far superior. Simply replace the soda called for in the recipe with a sparkling wine of your preference (I used Ste. Michelle blanc de blanc). Be sure to taste the batter before you bake it, in case it needs extra sugar. Eliminating the soda removes significant sweetness, and I was prepared to add up to one additional cup of sugar to the batter, but in this case it didn't need it, so the only substitution I made was with the liquid. The result is startling when you first bite in if you are not expecting it. But if you know in advance that the cake is made with wine, you will instantly appreciate the sophisticated flavor. It is moist and slightly spongey, though without being at all eggy as some sponge layers are. At the same time, the texture is very firm which makes it nice for cutting into shapes and sculptures, as well as for frosting, and simply for slicing beautiful, even pieces. But my favorite part of this cake is the yeasty aroma and slight aftertaste, like eating a delicious piece of freshly baked bread. What makes this cake so special for me is that it brings together elements that I don't generally envision together, in a way that makes them seem all the more unique and well-matched. Plus, I just love champagne and it is a great gesture of joyful celebration.


I wanted to fill it with vanilla custard on this occasion, but I had some snafoos with that recipe and ended up with a lightly sweetened whipped cream filling. I think the cake would be terrific with traditional champagne pairings like strawberries and oranges such as a strawberry mousse filling or a "mimosa" with orange curd and orange glaze.

This cake was very time-consuming to decorate due to the basketweave of the frosting (this is actually a delightfully clever and simple technique, but it does take some patience and some solid wrist control.) But the structural engineering couldn't have been simpler: bake in standard 9-inch pans and cut away one quarter. Cupcakes and mini-cupcakes comprised the tires and the question mark. This is what inspired this subject of this post... good cake (or, in this case, dry, powdery, tasteless cake).

As I said above, my intention with this blog is to document my own experiences and offer something of value to other bakers and eaters. I don't want to criticize, but in this case, sharing my disappointment with a recipe is an important part of establishing what criteria for later positive reviews and recommendations. That said, I couldn't be more unhappy with the "go-to white cake" lauded by 17andbaking.com. Even my husband when I silently offered him a taste - whose default answers are "it tastes delicious, you look great, you can decide" - took one bite of this cupcake and paused to think about how he is supposed to react. As he smacked his lips apart in paste-y disgust, I answered for him, "it's terrible!"

Now, in all fairness, the cake has a firm texture that helps it hold up well to cutting, layering, and frosting. The lack of taste also warrants it an easy accomplice to all sorts of frosting and filling combinations. Given this, it's especially important to determine why you think a cake is good; if you want something that is easy to mix, bake, and work with, this is a winner. But if it's not going to taste good on it's own, why would you want to drown it in disguising toppings? Frostings and fillings should enhance a cake, not rescue it from inedibility.

The Cake Bible addresses this topic very plainly, stating that while cakes can be works of art in their own right, ultimately they are created to be enjoyed orally, so if they don't taste good, in the end it doesn't really matter how pretty they are. I believed after reading those passages that The Cake Bible would have all my answers to ideal cake recipes. As it turns out (more about that in other posts), only some of the recipes are really to my liking, and many have let me down. But knowing what you want out of the cake in advance will get you all the closer to finding just the right one.


All that was left after the party.

Update 3 days later:
I am too frugal to throw away the leftover white cake cupcakes, but I was too embarrassed to share them at work, so I've just been eating off them a bit each day. I've been surprised at how they are not nearly as "flavorless" as I found them on the first day. A day and two days later, the cake is sweeter and more lemony so I am wrong to call it tasteless. I stand by my assessment of the texture being powdery; it still has a stick-in-the-throat pastiness. Nevertheless, I may give this recipe a second try using all-purpose flour; I've found over many experiments in the past that I find the fine grain of cake flour to result in a cake that is too dense and it's possible that is a factor here. Stay tuned.

Sunday, January 11, 2015

Limoncello Layer Cake


October 17, 2010: Today is my birthday, so naturally, I baked myself a cake. There have been a couple of articles in the Seattle Times the past few weeks about cookbooks that came out this year devoted exclusively to incorporating alcohol into baked goods. I have a few recipes I've been making for years that do this (chocolate kahlua cake, rum cake) but there are some very intriguing and au courant versions available now. Hence my revisiting the champagne cake for last weekend's baby shower, and again today with a lemon layer cake with campari frosting. There limoncello (Italian lemon liquer) in the batter which bumps up the lemonyness more than juice and zest can alone.


This is unquestionably the best lemon cake layer I have ever tried, so I will definitely be making it again. It is totally worth investing in the bottle of limoncello if you don't already have some. The frosting is flavored with campari which is an Italian bitters. It has a nice herbal forward, but the aftertaste is bitter. My husband loves it, and has spent months incorporating it into different cocktails, though our favorite is just a tiny splash (instead of vermouth) with gin for a sunset martini. I don't really like the bitterness, though the sweet and citrus of the rest of this cake definitely make for an enjoyable experience. Another benefit is the attractive peachy hue. 

Limoncello Cake Layers
from "The Boozy Baker", by Lucy Baker

2 cups all-purpose flour
1/2 cup cake flour
1 teaspoon baking powder
1/2 teaspoon baking soda
1/4 teaspoon salt
1 stick (1/2 cup) unsalted butter, softened
11/4 cups sugar
3 large eggs
3/4 cup buttermilk
2 tablespoons limoncello
2 tablespoons freshly squeezed lemon juice
1 tablespoon grated lemon zest

Preheat oven to 350. Grease two 8-inch round pans, and line with parchment.

Mix together flour, baking powder, baking soda, and salt. Set aside. In a separate large mixing bowl, cream together butter and sugar until fluffy. Beat in eggs one at a time. Stir in one third of flour mixture, then half of buttermilk, and repeat until well-mixed. Stir in limoncello, juice, and zest just until combined. Divide batter between two pans and bake for 32 minutes or until tester comes out clean. Cool on racks.

Campari Marscapone Filling
2/3 cup heavy whipping cream
1/4 cup sugar
1 tablespoon campari liquer
8 oz marscapone cheese

Beat cream and sugar together until soft peaks form. Stir in campari and continue beating until desired consistency. Loosen marscapone with fork, and fold in gently to cream. Fill cake layers with filling.

Frosting
I did a total mash-up of some icing and some leftover vanilla custard sauce that I'd already mixed with some other leftover cream cheese frosting. It ended up making an amazing frosting for this cake, so I'm actually quite disappointed that I'll probably never be able to recreate it. But to come as close as possible, here is what I can offer:

1/3 cup vanilla custard made from the custard filling recipe in the Joy of Cooking
2/3 cup vanilla cream cheese frosting from the recipe in Joy of Cooking
2 cups powdered sugar
1 stick butter
1 tablespoon buttermilk
1 tablespoon campari
1 tablespoon limoncello

Melt these all together over medium or medium low, just until combined, then stir with a rubber spatula over an ice water bath until thick but still spreadable.


I had to take this photo in the restaurant and the lighting was very poor. The cake
managed to survive transportation, but after we'd cut and served it and transported
it back home, the 1/4 that was left had completely slipped apart due to the softening 
of the filling. It was pretty ugly, but still tastes delicious as leftovers!

Holiday Bundt


Finally, for Christmas Day, I was quite excited about the Holiday Manhattan Bundt cake recipe from Kathy Casey. Rum cake is one of the moistest cakes I know, and I've always loved it, so I really liked the idea of a holiday cake swimming in bourbon and studded with marachino cherry jewels. This was the biggest disappointment to serve, because it stuck in my very well-oiled pan, and in an attempt to cover the tears, I used extra glaze, but it was already a thick, gloppy, and not very well balanced glaze (just powdered sugar and bourbon, so it had that chaulkiness and over-sweetness.) I was literally embarrassed to take this to my party, and had it been anyone other than family, I probably would have started over. But the cake slices themselves, as you can see in the photo, were pretty much just what I had in mind, and I really did love the flavor of this cake. It was quite strong in the alcohol taste, yet still appropriately balanced, and festive. It was also a very nice texture, moist and dense without being gummy. I will probably make this again, and leave to cool in the pan longer than suggested, as well as use a different glaze.


Manhattan Holiday Bundt Cake

Honey Spice Beer Cake


Year after year, I struggle along with adoreable shaped pans, making hideous shaped cakes. These pans are made for a standard pound cake or cake-mix cake, but try anything with a little flair or pizazz, and I guarantee it will stick, to the pan, and make a ^&*(%$! mess on your wall where you throw the pan with the cake gummed inside. I'm amazed my husband hasn't stolen the pans under cover of night and secreted them to the dump, given how many times he's heard me swear "I will never make another cake in these again!" as I tear around the kitchen trying to salvage whatever I can for whatever event I'm doubtlessly on my way to.


Recently, I'd saved the recipe for what is called "Honey Spice Beer Cake" from the Booze Cakes cookbook as it appeared in The Washington Post. I love spice cake anyway, and it seemed a seasonally-appropriate selection for my girlfriend gathering. What better way to holiday-it-up than to bake it in a snowman pan!?!

The cake is sticky from the honey, and really should have been made - as the directions call for - in a 9x13" pan (or a half-recipe in an 8" square pan, because it makes a lot) lined with parchment. The cake itself is delightful, moist, with a carmelized crust and a sweetness that is mellowed by the spices. I figured I could cover the rips and tears in the snowman's head and arms with frosting, but the frosting called for by the recipe - while also delicious (and the place where the beer in the recipe really comes through with a surprising and addictive flavor) - is definitely more a glaze than a frosting, as you can see from the significant "melting" my snowman was experiencing around the edges. Let's just say Seattle isn't known for our white christmases. But I will definitely  make this again for a filling, satisfying, snack cake. I think it could work well in a straight-sided tube pan where the glaze drizzled over and some candied fruits would make an attractive serving.

Note: I was unable to find the beer referenced in the recipe, but look instead for a sweeter, spicier, weiss. I found a German weiss beer at Central Market which had tasting notes saying it had cinnamon and nutmeg tones (veering away from the varieties described as citrusy).

Sunday, January 19, 2014

Oatmeal Peanut Butter Cup Cookies

Adapted a recipe from this blog, based on the appearance of the texture of the cookies in the photo. They turned out very delicious and very attractive, but were very crunchy, which I love but which was unexpected based on their appearance. They baked into very even cookies with a creased and crackled top that looked like a soft molasses cookie. 

½ cup sugar
1/3 cup brown sugar
½ cup butter
1/4 cup peanut butter
½ tsp. vanilla
1 egg
1 tsp. baking soda

¼ tsp. salt
1 cup flour

1 cup oats
about 10 oz peanut butter cups (used Trader Joe's milk chocolate) - chopped. Maybe be easier to chop cups if they are frozen first.
 cup instant oats

Cream butter, sugars, peanut butter, vanilla, and egg until blended. Add the dry ingredients and mix well. Stir in the chopped peanut butter cups. Bake at 350° for 10-12 minutes. Cool for a minute on the cookie sheet before removing the cookies.


Wednesday, December 25, 2013

Candied Kumquat and Ricotta Tart

For years and years, I've saved a candied kumquat and gingerbread cake recipe to make at the holidays. I love the idea of it, and the festive, jewel-like sparkle of candied fruit. But gingerbread just always sounds too heavy or substantial to follow what always ends up being rich and elaborate holiday meals. So when I came across this recipe also using candied kumquats but instead atop a delicate tart with a light ricotta filling, (on a day I just happened to unrelatedly click through a Facebook link to a blog post about making your own ricotta in the microwave!) I knew I had a winner. 


I have read previously about making ricotta at home and how easy it is and how superior it tastes to store-bought versions, but I'd still felt intimidated. Nor am I enough of a ricotta fan to notice sub-par commercial cheese in the few applications I ever use it. But when I read this posting for making it in the microwave literally in minutes, I had to try it if for no other reason than novelty. 

The recipe says 2 cups of milk yeild about 1/2 cup of ricotta. I repeated the recipe twice (used 1 quart milk total) and ended up with slightly less than a cup of cheese, which was just the right amount for the tart filling. I strained through paper towels for maybe 10 minutes and after refrigerating 24 hours, the cheese was quite firm and hadn't separated any more liquid. It was a lot of fun to watch the curds and whey separate so quickly and easily after just a couple minutes zapping, and in spite of the ridiculous ease, I didn't mind bragging that not only was the tart homemade, but so was the ricotta.

I also made the tart crust the day in advance, pressed into the tart pan and refridgerated unbaked. Other reviewers on epicurious were not as enamored with the crust, but I found it to be exactly right with this tart. It didn't crumble when sliced, it held up well against the soft cheese, and it was a tender crunch of sweetness. I only used just over half of what the recipe called for, and found it plenty thick in the pan. More would have disrupted the balance between flavors.

Slicing and deseeding the kumquats was by far the most time-consuming task. But put on some good music and it only takes about 40 minutes. I thought I did a really good job but when the kumquats were candying, a number more seeds floated to the top which I removed, and when I assembled the final tart, I found a number more that I couldn't retrieve, but which did not impact the final taste or texture. So, be conscientious in your removal, but absolute vigilance is not necessary.

I completed all steps the day in advace and kept components chilled separately overnight. The afternoon of the dinner I baked the crust, and as it takes just minutes to spread the filling in and top with kumquats, it was easy to assemble after it had cooled and still have time before dinner. 

One reviewer suggested slicing the tart before topping with the kumquats to make it easier to create attractive servings. I didn't have much trouble cutting through the full slice, but that is a good recommendation. My family all asked for seconds and were really impressed with the play of flavors in this tart. Happy Holidays!


Friday, November 22, 2013

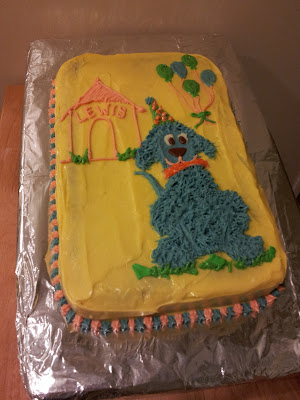
Fun Decorated Cakes: Seal and Dog

http://www.epicurious.com/recipes/food/views/Pear-Cake-with-Lemon-Honey-Cream-Cheese-Frosting-104048

Baked one recipe in a 9x13 pan.
Frosted with cream cheese frosting from Joy of Cooking (really only needed about 1 recipes worth, made 3 batches.)


Monday, September 9, 2013

Honey Spice Cake


SO good. So moist, with great carmelized texture on the crust and soft and spice interior. I would like to go back and try it with coffee next time, if it didn't overwhelm the spices. Ginger cakes are my favorite and the oil makes it so moist for days. I substituted nectarines for the plums because I couldn't find golden plums, and the thyme mixture was amazing.

Saturday, August 24, 2013

Mortarboard Cake

What have I been doing that I haven't posted in a month?? I've been graduating! I finished up my Master's degree in August, with all the wrap-up and transitions that go along with it. But in the end I had a fabulous party to celebrate with friends and family (a few very notable exceptions were sadly not in attendance) and I made these cakes to mark the occasion. The design was really easy (which I needed because it had to be large enough to serve 60 people!) but super adorable and festive.

I used the browned-butter cake layers that I made for Will's birthday, and quadrupled the recipe. I browned all the butter (3 pounds) at once, but it still took over 45 minutes to brown the butter on medium low. And that was the only step I could combine; I had to make each recipe separately (ie: the same thing 4 times) otherwise my mixer would overflow.

One-and-one-half times of an 8 or 9" cake recipe will make 10" layers, but I baked each batch in my 2 10-in pans for 32 minutes each. This made thinner layers, which worked just as well for this application.

My party was on Saturday and I prepared the cakes on Wednesday, then froze the layers that evening.

These were a lot of cake layers!


Then I frosted with a double batch of milk chocolate buttercream.
Refrigerated chocolate cookie dough rolled out into a sheet and baked on
parchment makes an easy mortarboard for my graduation cap cake.


Two three-layer 10" round cakes.

Ganache goes on over the buttercream.
Glazed with bittersweet

The mortarboard cookie needed some structural support to keep from sagging;
I constructed a platform from thin tagboard.
And decorated with a package of chocolate cookie dough, rolled flat and trimmed to a square. A dollop of ganache held the tassel in place, and gold sprinkles made the caps particularly festive.  

The finished cakes, and the relieved graduate.

To make two 10" cakes each with four layers, I mixed the recipe below four times, and divided each between two 10" cake pans for slightly thin layers.

Browned Butter Cake Layers
by Tom Douglas as found in Food and Wine magazine

3 sticks unsalted butter (12 ounces), plus more for greasing the pans

2 1/4 cups all-purpose flour, plus more for dusting
2 1/4 teaspoons baking powder
1 teaspoon salt
1 2/3 cups sugar
1 vanilla bean, split and seeds scraped (I used 1 tsp clear vanilla instead)
3 large egg yolks
2 large eggs
1 1/4 cups milk, at room temperature

Preheat the oven to 325°. Butter two 9-inch cake pans and line the bottoms of the pans with parchment paper. Butter the paper and dust the pans with flour, tapping out the excess.
In a medium saucepan, melt the 3 sticks of butter. Cook over low heat, stirring occasionally, until foamy, about 5 minutes. Continue to cook, stirring frequently, until the milk solids turn brown and the butter smells nutty, about 4 minutes longer. (Note, it took closer to 20 minutes for me.) Scrape the melted butter and browned bits into a large heatproof bowl. Set the bowl in an ice water bath until the butter begins to set around the edge, about 8 minutes.

Meanwhile, in a medium bowl, whisk the 2  1/4 cups of all-purpose flour with the baking powder and salt.

Remove the bowl from the ice water and scrape up the hardened butter. Transfer the butter to the bowl of a standing electric mixer fitted with the paddle and beat until creamy. Add the sugar and vanilla seeds and beat at medium-high speed until fluffy, about 3 minutes. Beat in the egg yolks followed by the whole eggs. Beat in the dry ingredients and milk in 3 alternating additions, scraping down the side and bottom of the bowl as necessary.

Pour the cake batter into the prepared pans and bake in the center of the oven for about 40 minutes, rotating the pans halfway through baking, until the cakes are golden and a toothpick inserted in the centers comes out clean. Cool the cakes in the pans for 20 minutes, then invert them onto a rack to let them cool completely. Peel off the parchment paper.


Chocolate ButtercreamFrom The Cake Bible2 pounds milk chocolate
1 pound bittersweet chocolate (I use Lindt 70%)
24 ounces unsalted butter, softened


Melt chocolate, then stir until smooth and room temperature. Beat butter until smooth. Beat chocolate into butter until smooth.

Bittersweet Ganache Glaze
9 ounces bittersweet chocolate (I used Lindt 85%)
1 cup heavy or whipping cream
1 tablespoon dark rum

Chop chocolate. Heat cream to simmer, and pour over chopped chocolate. Allow to rest a few minutes, then stir until smooth. Stir in liqueur. Allow to cool slightly, then pour over cake spreading till smooth but don't try to work it too much or it will streak and clump.


Monday, July 29, 2013

MM-Inspired Barley Salad for Picnic

I needed a good side dish to take to a bbq, and wanted to take a pasta salad but was worried that everyone else would do the same, so checked my cabinets and saw other delicious grains like quinoa and red rice, but selected barley as my base. I could easily swap barley for pasta and toss with sundried tomatoes, artichoke hearts, and kalamata olives. Or with cherry tomatoes, basil, and corn kernals. But I wanted something with more vegetables and more protein.
 
This party was BYOM where the grill was fired up by we were supposed to bring our own grillables. I didn't really want any meat so I wanted to build my salad around some beans. A google search of barley and garbanzo revealed these two recipes which I used as inspiration.
Chickpea, Barley, and Zucchini Salad with Mint and Feta
Moroccan Chickpea Barley Salad


1 cup barley
1 15 oz can garbanzo beans
1 small zucchini, diced or cut into matchsticks
3 medium carrots, diced
1/2 cup fresh mint leaves, chopped
1 cup fresh parsley (I used Italian parsley), chopped
zest from 1/2 lemon
1/2 cup crumbled feta cheese
 
Dressing:
1 tablespoon freshly squeeze lemon juice

2 tablespoons olive oil
1/4 teaspoon ground cinnamon
couple pinches of ground cardamom
1/8 teaspoon cayenne pepper
 
Cook barley by toasting over medium heat for about 5 minutes, stirring periodically, until some kernels are starting to turn golden and it smells nutty. I added 1 cup broth and 2 cups water, but you can use all water or all broth, and not all will be absorbed, so you can use a little less. Turn heat to high and bring to a boil, then reduce heat to simmer for 20-25 minutes until the kernels are tender all the way through. Cool. Toss with remaining ingredients except cheese. Drizzle with about half of dressing, and toss to coat. Add remaining dressing to taste. If not serving right away, reserve remainder of dressing, and toss just before serving, then sprinkle cheese over top and mix in lightly.

Saturday, July 27, 2013

Dad's birthday blueberry pie


Dad's birthday is always a time for blueberries or peaches. I have tried multiple different desserts for him over the years, generally a blueberry tart or a peach pie. This year I offered up a blueberry pie and his level of anticipation kinda went through the roof. He was pretty pleased with the results, especially with the accompanying homemade coconut ice cream, which is good when you're 67 and have had all matters of different types of birthday celebrations and are getting a bit tired of the chocolate cake your mother buys your or the fancy restaurant your sister wants to take you too when it is the middle of July and all you want to do is sit on your deck in the sun grilling steak and prawns and sopping up buttery pie crust with some blueberry juice and melting ice cream. So go dad for doing what you want one day when all the rest of the year you do for others!


Everyone loved this pie and the coconut ice cream was an excellent accompaniment. I will not make it again, because I thought it was too gelatinous in consistency. It was also a bit sweet, but that could be a factor of the berries and not the amount of sugar - but perhaps 1/2 cup sugar would be plenty. I try to avoid pies in general that use thickeners, but I saw this Cooks Country recipe that calls for the pectin from an apple as part of the thickener along with a bit of tapioca and I might find that more to my preference for next time. Even my tried-and-true Joy of Cooking doesn't really have any berry pie options that sound much better, and that could just be the reason I'm not a huge fan of them. But if any of you readers have suggestions for great fruit pie recipes, please post them in the comments.

I do think the rum added a nice depth to this pie and countered some of the sweetness, and the slices were attractive and not so messy when served, which was also nice. I thought about plums as another source of pectin that might be complementary to blueberries in that they wouldn't be very noticeable but could still add some tartness and deeper notes, particularly in the version made with wine. Readers - try that and let me know! In any case, happy summer baking!

Blueberry Pie
From The Boozy Baker, by Lucy Baker

2/3 cup sugar
3 T cornstarch
¼ t cinnamon
¼ t salt
¼ cup dark rum (or fruity red wine for a “sangria pie!”)
4 cups fresh blueberries, divided
1 T unsalted butter

I used the other half of the Smitten Kitchen all-butter pie crust I had left in the freezer from two months ago. It bakes much more like puff pastry than what I think of as pie crust, meaning that it is totally delicious, but not necessarily always what you would want. As it was selected to accompany cherry pie, it absolutely worked well for an open-faced blueberry pie.


Combine sugar, cornstarch, cinnamon, salt, rum (or fruity red wine), and 1/3 cup water in saucepan. Add 1 ½ cups blueberries and bring to boil over medium. Boil 1-2 minutes until very thick and clear. Remove from heat, add butter and stir until melted.

Add remaining 2 ½ cups berries and pour into piecrust, then chill until set.


Sunday, July 21, 2013

Salted Caramel Ice Cream and Coconut Ice Cream

Perfectly divine. Salted caramel is a trendy craze whose time - in Seattle at least - is over-the-hill in my opinion. But that doesn't make the salty sweet caramelized flavor of this decadent dessert any less delectable. I offered to bring homemade ice cream to a small dinner party and didn't have any guidance on the menu or other taste preferences. So I wanted to break out of the vanilla mold, especially since I wasn't trying to pair with a cake or pie or other baked good. I wanted a flavor that could stand on its own as dessert.

This ice cream is incredibly rich, and it is quite sweet, but I did not find it cloying and in spite of the heavy ratio of cream to milk, because of the caramel it did not have that greasy coat-the-spoon texture of some ice cream that is really just TOO rich.

When it was finished churning, it still poured out of the freezing canister (rather than being scooped) so I was a bit concerned about how it would set up. But what that really meant is that after a couple of hours of freezing, this ice cream had an absolutely perfect, creamy, scoopable consistency. Just don't expect to make and serve this right away, you'll want to plan enough time to return the churned product to the freezer.

I like to add a bit of alcohol to my ice creams, to preserve the consistency by preventing a completely solid freezing of the mix and to inhibit the particular formation of ice crystals that diminish an ice cream's consistency. In this case, dark rum - even in such a small quantity - adds a lot to play off the deep notes of caramelized sugar. This is absolutely a full-star recipe and I can't wait to make it again.


Salted Caramel Ice Cream
Adapted from
Gourmet Magazine

1 cup sugar
2 1/4 cups heavy cream, divided
1/2 teaspoon flaky sea salt such (I had fleur de sel)
1/2 teaspoon pure vanilla extract
1 cup whole milk
3 large eggs

1 tablespoon dark rum (or brandy)

Heat 1 cup sugar in a heavy, dry 10-inch pan over medium heat, stirring to heat sugar evenly, until it starts to melt. Stop stirring and allow sugar to melt to a dark amber, swirling occasionally. Once it gets going, it happens quickly, so watch the pan carefully.         

Add 1 1/4 cups cream (mixture will spatter) and cook, stirring, until all of caramel has dissolved. This can take awhile, and at first the sugar will all turn into a hard clump, but jut keep stirring the simmering cream and it ultimately will all dissolve. Strain caramel into a bowl and stir in sea salt and vanilla. Cool to room temperature.

Meanwhile, bring milk and remaining cup cream just to a boil in a small heavy saucepan, stirring occasionally.

Lightly whisk eggs in a medium bowl, then add a bit of hot milk mixture in a slow stream, whisking constantly. Pour back into saucepan and cook over medium heat, whisking constantly, until custard coats registers at least 160°F (do not let boil).

Note: most of my ice cream recipes use a maximum of two eggs and 3 cups of milk/cream so the ratio of this step of the custard making is much different. As a result, the eggs come to temperature much more quickly and it's easy for them to curdle, so be sure to whisk constantly and watch carefully.

Pour custard through a fine-mesh sieve into a large bowl, then stir in cooled caramel. Chill overnight, then stir in 1 scant tablespoon dark rum before freezing in ice cream churn. Allow enough time to return churned mix to the freezer to freeze for a couple of hours before serving. Mixture will still be quite soft after churning but will firm to the perfect consistency.

Coconut Ice Cream

I chose coconut ice cream to accompany blueberry pie for my dad's birthday. It was an excellent accompaniment with good strong coconut flavor, but the consistency of this batch was not comparable to the few I've made. I can blame it on coconut, which is not my favorite flavor to begin with, or I can blame it on the fact that I "upgraded" to heavy cream (which is 40% fat) compared to the 36% fat whipped cream that I usually use. I very carefully calculate the percentages of fat in all my recipes, accounting for whole versus skim milk, and I did not do that this time, and I think it makes a real difference. It could be an improvement that I am just not used to, or it could actually be what pushes it over-the-edge to "too rich." In any case, it worked great with sweet, fruity, berry pie but Will will have to work through the leftovers in the freezer on his own.

Bring 1 1/2 cups cream to simmer then stir in 2 cups toasted shredded sweetened coconut. Cover, and steep 30 minutes.
Strain mixture and stir in 1/2 cup sugar and 1/2 cup milk, return to simmer. Separately beat 2 eggs, then slowly whisk in part of hot cream mix, then return egg mixture to remainder of cream and whisk constantly over medium heat until it reaches 160 degrees. Remove from heat immediately and stir in additional half cup milk and half cup cream, along with 1/2 teaspoon coconut extract and 1 tablespoon light rum. Chill overnight then churn and freeze.